Many people aren’t aware of it, but when they download music they’ve purchased from Apple’s iTunes service, the music they download has their own personal information embedded in the music files. While the music is DRM free, it does have those strings attached. You can read more about it here:
Chrome With Privacy
If you like Google’s Chrome (aka Chromium) browser but don’t like Google’s privacy policies associated with it, give SRWare’s Iron a try. SRWare’s Iron is based on Chromium source, so you can use it as you would Google’s own browser. With Iron, extensions and themes work just as they would in Chrome. There are Mac, Linux, and Windows versions available for downloading. Go to SRWare’s web site to try it out.
Downloading Music From YouTube
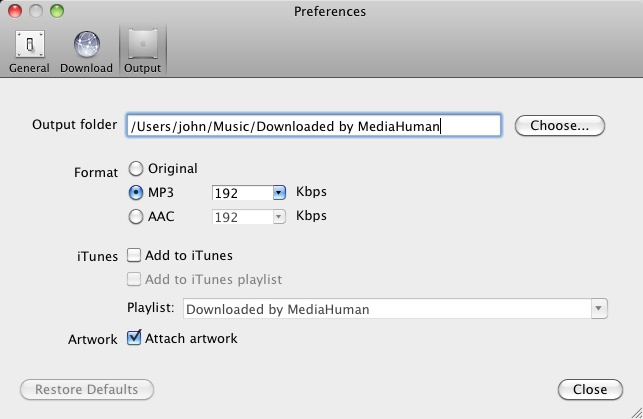
YouTube contains a wealth of music. The problem is that its in the form of Flash video. What is needed is the ability to download the Flash video, and then extract the music from the video into a format that most music players can understand. The easiest solution is to use the YouTube to MP3 Converter utility by MediaHuman. Its absolutely free, and you can download it HERE. It comes in both Windows and Mac OSX flavors, and its very easy to use. After you have it downloaded and installed be sure to set up your desired preferences first. You can choose the format you want the music to be saved in, and where you want it to be saved.

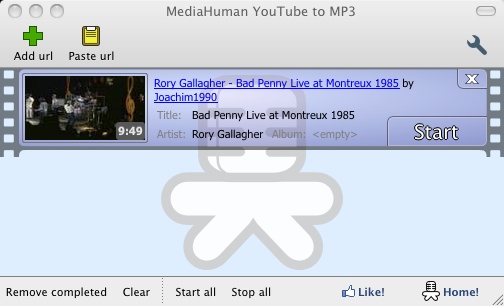
When you have found music that you wish to save, simply drag and drop the URL from your browser’s address bar to the application window. Then click the big “Start” button. Your music will be downloaded into the folder in the format you had previously specified in your application preferences. How could it be any easier than that?

Another solution is MacX Video Convertor Pro by Digiarty Software. The current version is 3.2.1, and you can download it: HERE. It is shareware, and after 15 days it will ask that you purchase it.

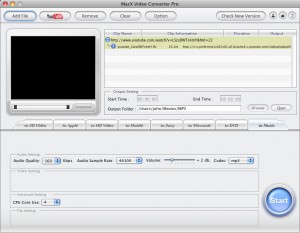
This is how it works. Using your browser go to the YouTube video that you’re interested in. Go to the address bar in your browser and highlight and copy the URL (command-a then command-c). To make sure you get the highest quality possible, be sure to append “&fmt=22” to the end of the URL first before copying it. For example, http://www.youtube.com/watch?v=LSzsDWTc4mY* becomes http://www.youtube.com/watch?v=LSzsDWTc4mY&fmt=22*. Next in MacX Video Convertor Pro, click on the YouTube button at the top, and your URL will be automatically pasted into the download URL. Next choose the “Music” tab, choose the sound quality, and then click the large blue “Start” button. Thats it. The video will be downloaded and converted to an MP3 all in one step!
With PHP, SOAP Is - Well - Simple!
SOAP stands for Simple Object Access Protocol. In a nutshell, it is a way for applications to communicate over HTTP using XML.
What I have done is set up a simple example that, given a zip code, will use SOAP to connect to NOAA to retrieve the current weather. Rather than give a wordy explanation, I’ll just post the code below. For simplicity I’ve made this a version that works from the command line. You can download the code below here: Soapy Weather CLI. I have a web based version here that you can try out: Soapy Weather
1 2 3 4 5 6 7 8 9 10 11 12 13 14 15 16 17 18 19 20 21 22 23 24 25 26 27 28 29 30 31 32 33 34 35 36 37 38 39 40 41 42 43 44 45 46 47 48 49 50 51 52 53 54 55 56 57 58 59 60 61 62 63 64 65 66 67 68 | |
Accessing Objects as Arrays in PHP
As I was studying the PHP SPL I came across the ArrayAccess class. I wondered what use it could possibly be since PHP’s array functionality is quite rich. So, I sent an email off to Lorna Jane, whom I met at this year’s PHP Community Conference held here in Nashville back in April. She gave me a very good explanation, so I decided to work up an example to cement the knowledge in my brain.
Since an example is worth a 1000 wordy descriptions, here is my Fruity example below.
First we need a basic object to describe a Fruit:
1 2 3 4 5 6 7 8 9 10 11 12 13 14 15 16 17 18 19 20 21 22 23 24 25 26 27 28 | |
Next we need a class that actually implements the ArrayAccess class that holds a collection of these Fruit objects:
1 2 3 4 5 6 7 8 9 10 11 12 13 14 15 16 17 18 19 20 21 22 23 24 25 26 27 28 29 30 31 32 33 34 35 36 37 38 39 40 41 42 43 44 45 46 47 48 49 50 51 52 53 54 55 56 57 58 59 60 61 62 63 64 | |
Finally we need a little program that demonstrates how it all works together.
1 2 3 4 5 6 7 8 9 10 11 12 13 14 15 16 17 18 19 20 | |
All this code, if run from the command line, will product the following output:
Access the objects as a traditional array...
apple is crunchy
orange is tangy
banana is yellow
grape is small
cherry is red

...or use the Iterator implementation...
apple is crunchy
orange is tangy
banana is yellow
grape is small
cherry is red
You can download the source used in this posting: here
Installing MongoDB
On OSX do the following. Download the latest production release of MongoDB from here:
http://www.mongodb.org/downloads
Then install it in /usr/local using the following commands:
1 2 3 4 | |
Next you’ll need to create the MongoDB configuration file. First set up the storage location for the MongoDB database files:
echo "dbpath = /usr/local/mongodb_data" > /usr/local/mongodb/mongodb.conf
If you only want it to accept local connections, add this line to the config file:
echo "bind_ip = 127.0.0.1" >> /usr/local/mongodb/mongodb.conf
To get MongoDB to startup & shutdown automagically with OSX, you’ll want to create a launchd entry: /Library/LaunchDaemons/org.mongodb.mongod.plist
1 2 3 4 5 6 7 8 9 10 11 12 13 14 15 16 17 18 19 20 21 22 23 24 | |
Thats about it. To manually start & stop MongoDB type:
1 2 | |
On Ubuntu Linux the installation instructions are similar, with a few differences:
Download the latest production release of MongoDB from here: http://www.mongodb.org/downloads
Then install it in /usr/local using the following commands:
1 2 3 4 | |
Next you’’ll need to create the MongoDB configuration file. First set up the storage location for the MongoDB database files:
echo "dbpath = /usr/local/mongodb_data" > /usr/local/mongodb/mongodb.conf
If you only want it to accept local connections, add this line to the config file:
echo "bind_ip = 127.0.0.1" >> /usr/local/mongodb/mongodb.conf
Next you’ll want to put an entry into /etc/init.d so that it will startup & shutdown with Ubuntu. Download this file, gunzip it, & place it in /etc/init.d. Make sure it has executable permissions: MongoDB.gz
With both OSX and Ubuntu, if you did everything correctly, your MongoDB process can be found running here: http://localhost:28017
PHP Community Conference
The PHP Community Conference will be in Nashville later this month! Below is the description taken from the conference’s web site:
“The PHP Community Conference is a two-day event. We kick things off with a tutorial day that will introduce you to tools and ideas that you can use in your code right away. The second day will consist of presentations that will inspire you to create something new with PHP. With the help of our sponsors, we are able to offer admission to the entire event for $300. We’ll provide lunch and snacks on both days. On Friday night, we’ll finish off the conference with a party featuring pecha kucha talks by our awesome attendees. The best pecha kucha talks will have a chance at winning one of two iPad 2s sponsored by CakeDC”
Browser Wars 2
OS: Mac OSX 10.6.7, Windows XP SP3
Browsers: Safari 5.04, Chromium 80114, Opera 11.01, Firefox 4.0, Camino 2.07, IE 8
Benchmarks: Kraken, ACID3, Sunspider 0.9.1, V8 Benchmark Suite v6
| Kraken | SunSpider | V8 | ACID3 | |
|---|---|---|---|---|
| Safari | 11013.8 | 286.8 | 2926 | 100/100 |
| Chromium | 7299.4 | 262.3 | 8253 | 100/100 |
| Opera | 12468.4 | 285.0 | 3410 | 100/100 |
| Firefox | 5580.4 | 253.2 | 3865 | 97/100 |
| Camino | aborted | 2594.0 | 214 | 72/100 |
| IE 8 | aborted | 4312.4 | aborted | 20/100 |
So who has won this round of the browser wars? I would say its a tossup between Chromium and Firefox, with the edge going to Chromium for passing the ACID3 benchmark. It was no surprise that the big loser was Microsoft’s Internet Explorer 8.
Chromium (the development version of Chrome) was the clear winner in the V8 benchmark, where the larger number is better. It came in a close second with the Kraken and Sunspider scores. It is ACID3 compliant.
Firefox 4 was the clear winner in the Kraken and SunSpider benchmarks, and it came in a distant second to Chromium on the V8 score. Its too bad its not 100% ACID3 compliant or I would have given the top ranking to it.
Safari and Opera were disappointments here. Except for passing the ACID3 test, Safari and Opera trailed Chromium and Firefox considerably. On my Mac Safari came in second to last on the V8 and SunSpider benchmarks, and Opera came in second to last on the Kraken benchmark.
Camino. Well about all you can say for Camino is that it runs. If you’re a Camino fan (and I was a fan years ago), you must ask yourself one simple question: Why? Camino, by far, scored the worst in every benchmark. It didn’t even come close to passing the ACID3 test, and I had to kill the browser because it was stuck in the Kraken benchmark.
Internet Explorer 8 (aka Internet Exploder) was abysmal. It was much worse than Camino, and I had to abort the Kraken and V8 tests because IE was throwing up slow script warnings. They were slow because they were running under IE 8! I feel sorry for you if you rely on this browser. I understand IE 9 is supposed to have big performance improvements, but I don’t have Windows 7 (and therefore IE9) and am not planning on buying it anytime soon.
Port Forwarding With VMware Fusion & NAT
Perhaps you would like to run a Linux based web server under VMWare Fusion, and would like for it to be accessed from the internet. This will explain how to set it up.
Your first task will be to set up a static IP for your VM. First you’ll need to find out what the MAC address VMWare is using for your VM. You can obtain that information by going into VMWare’s virtual machines directory to see what it is assigning to its ethernet0.generatedAddress parameter. On my Mac, I can find that here:
/Users/john/Documents/Virtual Machines.localized/Ubuntu.vmwarevm
So I open a Terminal window (I like iTerm) and issue these commands:
1 2 | |
and I get this back:
1 2 | |
Make note of the generatedAddress entry, we’ll use that below.
Next you need to go to this folder…
/Library/Application Support/VMware Fusion/vmnet8
…then edit dhcp.conf and look for an entry similar to this:
1 2 3 4 5 6 7 8 9 10 11 12 13 14 15 16 17 | |
For each VM that you wish to set up a static IP, you will need to make a similar entry at the end of the file. Make sure the fixed-address entry below is outside the range is the subnet entry above (192.168.216.128 through 192.168.216.254).
1 2 3 4 | |
After this entry, save dhcp.conf.
Now, in the same directory as dhcp.conf you will find another configuration file called nat.conf. Open up nat.conf for editing. and make the following addition under the [incomingtcp] section:
80 = 192.168.216.32:80
Optionally, you may wish to make entries in your Mac’s /etc/hosts file. For example:
1 2 | |
After making these changes, you will need to restart VMWare networking with the following command:
sudo "/Library/Application Support/VMware Fusion/boot.sh" --restart
Thats all there is to it. You are now ready to run your web server in a Linux VM !
Adding New Themes to Ubuntu
Want to spice up your Ubuntu desktop the easy way? Open up the “Ubuntu Software Center”, choose Edit, then choose “Software Sources”. Next, click on the “Other Software Tab” and click “Add&”. On the APT line, enter:
ppa:bisigi/ppa
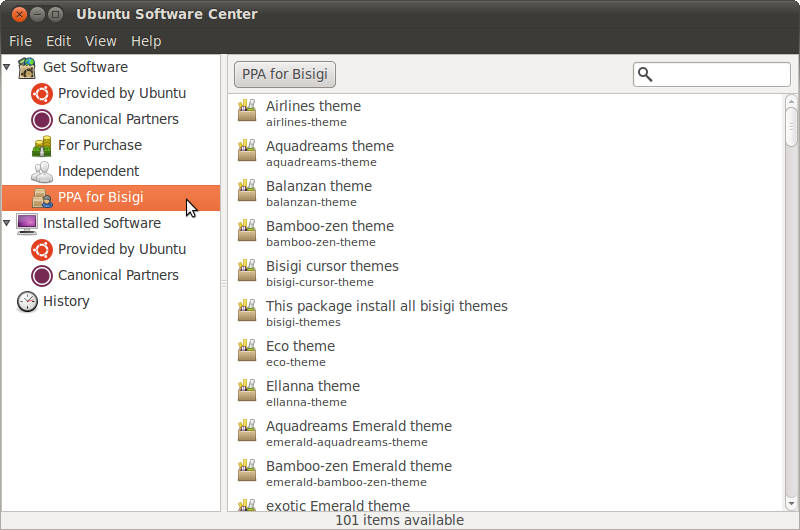
This will make all the themes from the Bisigi project available. From this point on, anytime you want to change your desktop theme, just go back to the “Ubuntu Software Center”, click on the “PPA for Bisigi” option on the left, and choose a theme on the right to install.
